实现效果
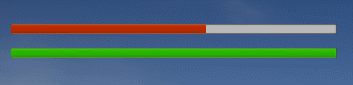
思路
分两个进度条重叠放,
一个在前面显示深红的真血条,但是背景条完全透明;
一个在背后显示淡红的跟随血条,背景条不透明。
如果 真血条减少:
----跟随血条等待一会后,循环减到真血条百分比。
如果 真血条增加:
----跟随血条直接跳到真血条位置。
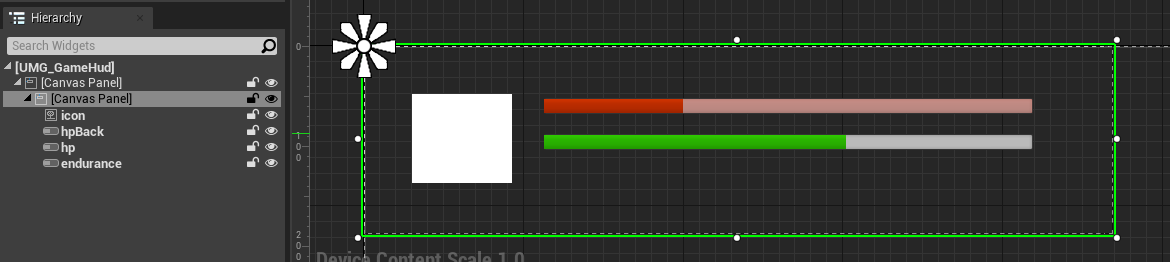
实现
我习惯用Lua,所以用Lua演示,思路是一样的。
首先创建一个UserWidget,主要需要两个血条,hp在前,hpBack在后:
hp的背景条透明:
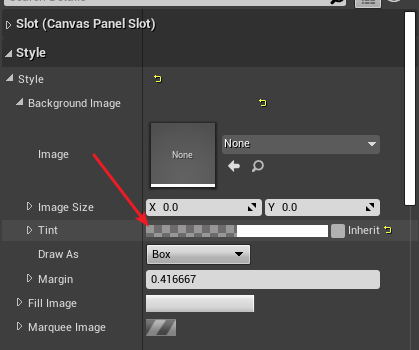
hpBack的进度条半透明:

核心代码:
local cls = {
    hpPercent = 1,
    hpBackPercent = 1,

    --每秒变化量
    hpBackAdd = 0.3,
    HPBackLoopFunc = nil,

    -- 缓存变量
    hpBackLastChangeTime = 0,
}

--循环让跟随血条过渡到真血条
function cls:OnHPBackLoop()
    local again = true
    if self.hpBackPercent > self.hpPercent then
        self.hpBackPercent = self.hpBackPercent - self.hpBackAdd * (GF:Now() - self.hpBackLastChangeTime)
        self.hpBackLastChangeTime = GF:Now()
    end

    if self.hpBackPercent <= self.hpPercent then
        again = false
        self.HPBackLoopFunc = nil
        self.hpBackPercent = self.hpPercent
    end
    self.hpBack:SetPercent(self.hpBackPercent)

    return again
end

-- 根据dataModel更新widget显示
function cls:Update(model)
    self.hp:SetPercent(model.hpPercent)
    self.endurance:SetPercent(model.endurancePercent)
    self.hpPercent = model.hpPercent

    if self.hpBackPercent <= self.hpPercent then
        self.hpBackPercent = self.hpPercent
        self.hpBack:SetPercent(self.hpBackPercent)
    else
        self:DelayCall(0.3, function()  --延迟调用
            if self.HPBackLoopFunc == nil then
                self.hpBackLastChangeTime = GF:Now()
                self.HPBackLoopFunc = self:LoopCall(0.01, false, function()     --循环调用
                    return self:OnHPBackLoop()
                end)
            end
        end)
    end
end

 --[[
 DelayCall、LoopCall函数定义
]]--

return cls